In this tutorial, we’ll look at how to disable a button in JavaScript.
We’ll be looking at
1. How to retrieve the button element in JavaScript,
2. Then 2 different ways to disable it from within your script file,
3. How to conditionally disable a button and finally,
4. How to toggle between enabled and disabled based on button clicks.
Retrieve the button element
Before we disable the button or perform any operations on it from your JavaScript file, you need to create the button and retrieve it. Let’s look at how to do that in this section.
Create the HTML element
To start with, in our index.html file, let’s create a button with an id ‘button’ and with a button text that says, ‘Click me!, as shown below:
<button id="button">Click me!</button>
Get the HTML element using JavaScript
Now, let’s retrieve the element from within the JavaScript file. There are multiple ways to retrieve DOM elements in JavaScript, and one of the most popular ones is by using the getElementById method.
In HTML, ids are unique to the elements they’re associated with, and since we’ve specified one for our button (‘button’), we can use the getElementById method to retrieve the element that has an id of ‘button’, which just so happens to be the button we’re targeting.
Once retrieved, let’s place the element inside a variable called ‘button’. We’re naming everything ‘button’ for easy remembrance. You can change the names as you see fit
let button = document.getElementById('button');
Alternatively, you can use the querySelector method to retrieve any element(s) by specifying their query.
In our instance, #button refers to an element with an id of ‘button’. If our button had a class of buttonClass for example, we’d have specified the query as .buttonClass instead.
let button = document.querySelector('#button');
console.log(button); //<button id="button">Click me!</button>
As you can see above, the variable where the retrieved element is placed contains our exact button, including its id, that is, the HTML code of it.
Using the Disabled property
Now that we’ve retrieved the button in our JavaScript file, let’s disable it. The easiest way to do the same is by using the disabled property and setting it to true, as shown below.
button.disabled = true;
You can set the value to false to enable the button again.
Using the setAttribute method
Another way of disabling a button is by using the setAttribute method. This pre-defined JavaScript method can be used to set any attribute in HTML, including the disabled property of a button.
This method takes 2 arguments. The first argument is the attribute you want modified, and the second is the value you want to set to the attribute.
As you probably guessed by now, we’re going to set the ‘disabled’ attribute to a value of true to disable our button, as shown below:
button.setAttribute("disabled", true);
How to disable a button in JavaScript using a condition
You can disable a HTML button based on a condition as well. The condition can be anything you like.
In our example, we’re going to be extracting the id of the button element we retrieved. We’re checking if its ‘button’, and if it is, we’ll be disabling the button. Otherwise, we’ll be enabling it.
Right now, you might not see much point to setting this condition, but when the dynamic nature of bigger real-world programs come in to play, where the various attributes of an element changes based on user inputs, these conditions will be really helpful.
let button = document.querySelector('#button');

if(button.id === 'button') {
    button.disabled = true;
}
else {
    button.disabled = false;
}
You can also just check the inner text of the button. These are just some examples to get you going. As I mentioned earlier, the condition can be literally anything you can think of.
if(button.innerText === 'Click me!') {
But I’d like to stress about JavaScript’s case sensitivity for this example. Make sure you compare the exact same string, with all the characters and case intact, down to the last exclamation point, or you’ll end up with a ‘false’ value.
‘Click me!’ is not equal to ‘click me!’, which is not equal to ‘click me’.
Toggle the disabled property in button
Finally, I’d like to demonstrate how to set up a toggle condition with the display property.
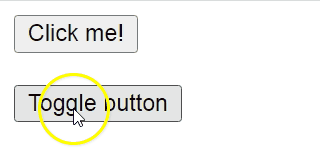
In our HTML file, let’s add two line breaks using the br tag and then add another button (Toggle button) with an id of ‘toggle’.
    <button id="button">Click me!</button>
    <br/><br/>
    <button id="toggle">Toggle button</button>
Then, let’s retrieve ‘toggle’, along with the original ‘button’. Let’s also create a variable bool and set it to a default value of false.
This variable is going to determine whether your ‘button’ is going to be disabled or not. Since we’ve set it to a default value of false, by default, it’s going to be enabled.
Now, let’s set a click event listener on the toggle button by using the addEventListener method and the ‘click’ event.
In the anonymous function (the second argument of the addEventListener method), let’s toggle bool’s value.
By negating the current value of bool, whenever the ‘toggle’ button is clicked, the current value of bool, if false, will change to true, hence disabling the ‘button’, and vice versa.
Finally, as usual, let’s set the disabled property of button to bool, as shown below:
let button = document.querySelector('#button');
let toggle = document.querySelector('#toggle');
let bool = false;

toggle.addEventListener('click',() => {
    bool = !bool;
    button.disabled = bool;
});
Now, let’s see our program in action:
As you can see above, whenever you press the toggle button, the ‘Click me!’ button is either enabled or disabled, based on how it was before the click. That’s a perfect toggle right there!
There you go! We looked at:
1. Different ways of retrieving the HTML button with JavaScript
2. Using the disabled property and the setAttribute method to disable the button
3. Conditionally disabling a button and finally,
4. Creating a disable – enable toggle with our button